WormMainea
  • Home
  • Basics
  • FAQs
  • Your Bin
  • Store
  • Blog
  • Blog Archive
  • Vermicompost Tea
  • Speaking & Events
  • Feedback
  • About
  • Contact
  • Links & More Info

More thoughts on scaling up

2/12/2023

0 Comments

 
I recently fielded a question about how much food is needed for large-scale vermiculture. A good rule of thumb is that you want the worms to have access to about 75% of their body weight in food they can eat per day. Which means that you have to estimate how much and how fast the food is rotting in your system, which can be tricky.

In practice, I have found that how much food I need each week depends on the soil temperature of the bins (where warmer = faster breakdown =  more food is available per day) and details about what comprises the “food”. Because some food breaks down quickly (leafy greens, fruit, etc.) and some slowly (fibrous husks & stalks, root vegetables, etc.). Also, the size of food pieces and whether it’s been frozen or smashed are factors in breakdown time. 

Soil temperature can be controlled (measured, or predicted based on season), but the food mix depends on your source and how consistent it is. I strive for consistency by working with my restaurant supplier, but there are perturbations that you will have to manage on the fly. 

A practical & simple tracking system for feeding that is used every time can help manage this (without going too crazy worrying about it). I use a taped date-fed list on my bins and tracking notebook (temperature, food source, and notes about the food that day), but anything that you will use can work. This is especially helpful if you're experimenting or changing/adding food suppliers.

Despite my best efforts, I have days when I’ve got extra food with nowhere to put it and other days with bins waiting to be fed. I note which bin(s) need to be fed next or are good for a while, to prevent overthinking this. My goal is to have most of my bins in active reproduction and growth so I can live with a few being a bit underfed as long as I remedy that in the near term.

Uncertainty and experimentation are part of what I find interesting about vermiculture. I hope you do, too!

Cheers,
Mark
0 Comments

Native Plant Update

9/22/2021

0 Comments

 
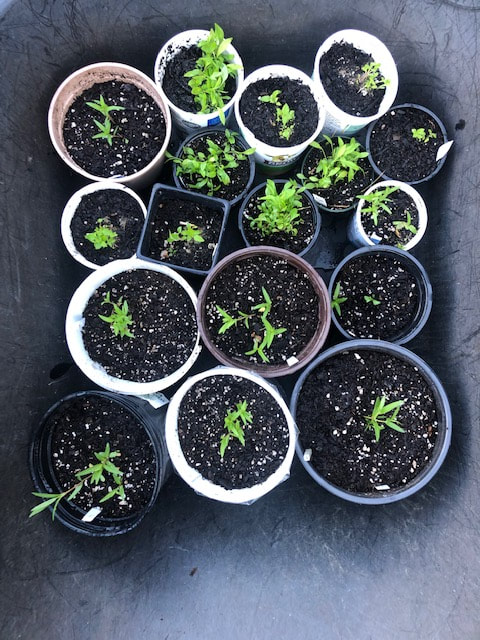
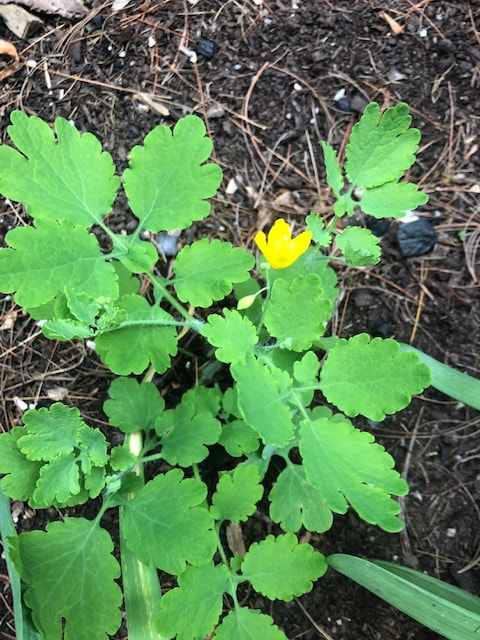
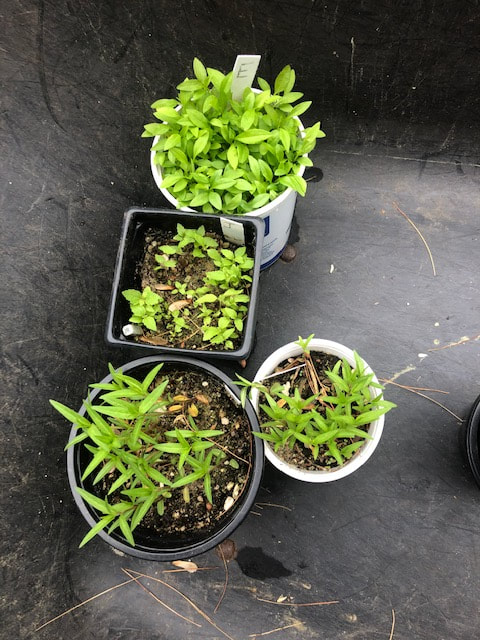
Since my last post on my native plants, my plants have moved from the seedling bed to their final planting locations. 

I had good success through early June with a few species developing true leaves and looking great in a partly sunny location. Then our June drought arrived and chipmunks found a nice source of food and moisture (my native seedlings). Seeing the bright side of my partly-ruined project, I took the larger view that native plants feed wildlife as one purpose. In that context it was not a complete failure for those plants that I lost. Unfortunately, I lost all but the ascelpias (swamp milkweed and butterfly bush), one echinacea, and the Joe Pye weed plants. These are now in the ground and flourishing (see photos). I hope to have flowers next year.

Cheers,
Mark
Picture
Picture
Picture
0 Comments

Native Plants

1/9/2021

0 Comments

 
​Having removed the invasive plants from my yard (aside from monitoring and maintenance), I am now continuing the next step, to add more native plant species to my yard. 

I have previously blogged about the many benefits of native plant species and shared some pics of some plants I bought at a native plant sale. Last winter I took a class put in by Wild Seed Project (https://wildseedproject.net/category/plant-profiles/) to learn about growing native plants from seed.
The class was great and the step-by-step instructions that I will briefly repeat here. I recommend you visit their website for details.

At the end of November, I started several species that I plan to add to my yard next fall:
  1. columbine (wild-type seed collected from my yard)
  2. rudbeckia (wild-type seeds from my friend Steffi's yard)
  3. New England aster (wild-type seed collected from my yard)
  4. heart leaved aster (wild-type seed collected from my yard)
  5. Culver’s root (wild-type seed collected from my yard)
  6. milkweed (wild-type seed collected from my yard)
  7. butterfly weed (wild-type seed collected from my yard)
  8. swamp milkweed (wild-type seed collected from my yard)
  9. Joe Pye weed (wild-type seed from my friend Kristen's yard)
Note that in no case did I harvest seed from wild plants. Wild plants have enough challenges without stealing their seeds! If you want plants of a species that you or a friend do not have, buy seed from the Wild Seed Project.

According to the instructions from Wild Seed Project, I gathered the following:
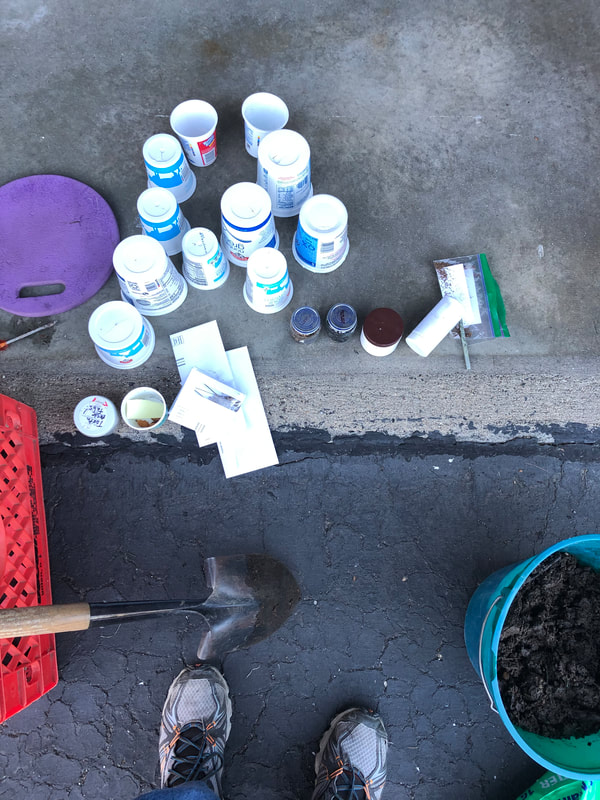
  1. Short unused plastic pots as well as some yogurt containers that I had been saving for this project (I punched drainage holes in the bottoms of the yogurt containers).
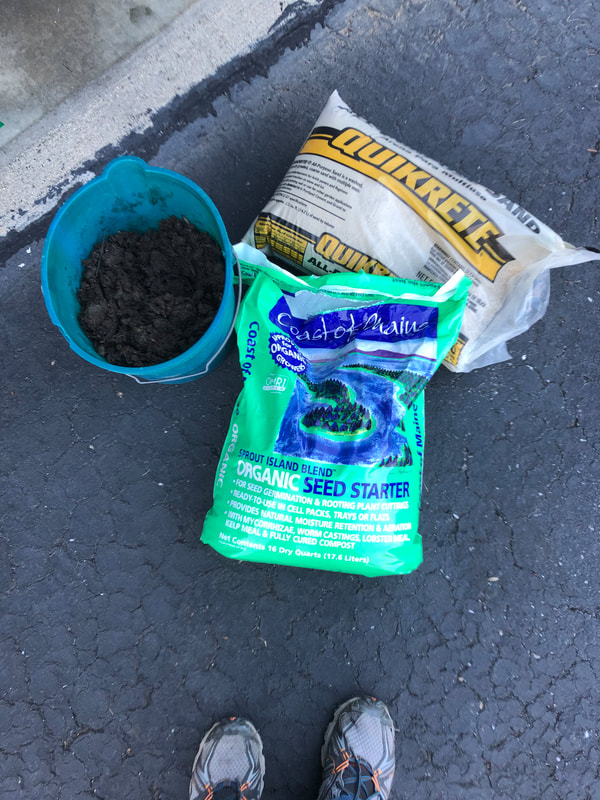
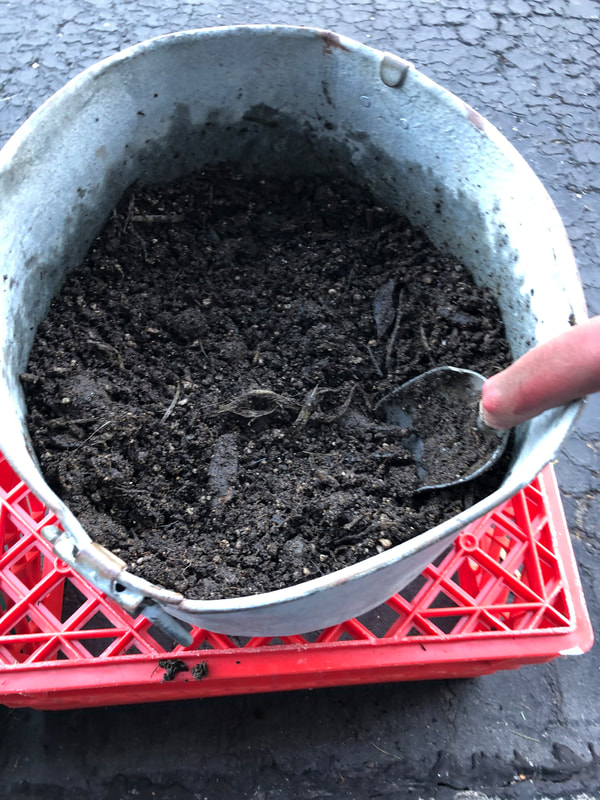
  2. Soil mix. I used Coast of Maine Organic Seed Starter and my own compost from my outdoor composter. I mixed these thoroughly (50:50 by volume) in small batches to fill my pots. My compost was wet, so there was no need for me to moisten the soil mix (it clumped nicely when mixed).
  3. Builder's Sand which is a coarse grade of sand used to cover the seeds. I got mine from Lowe's (my local ACE did not have it).
  4. Plastic strips for labels (I cut these from the yogurt container lids) and a pencil.
  5. Soil sieve.
Then I filled my pots and gently tamped the soil to create a flat surface about ½ inch from the top.
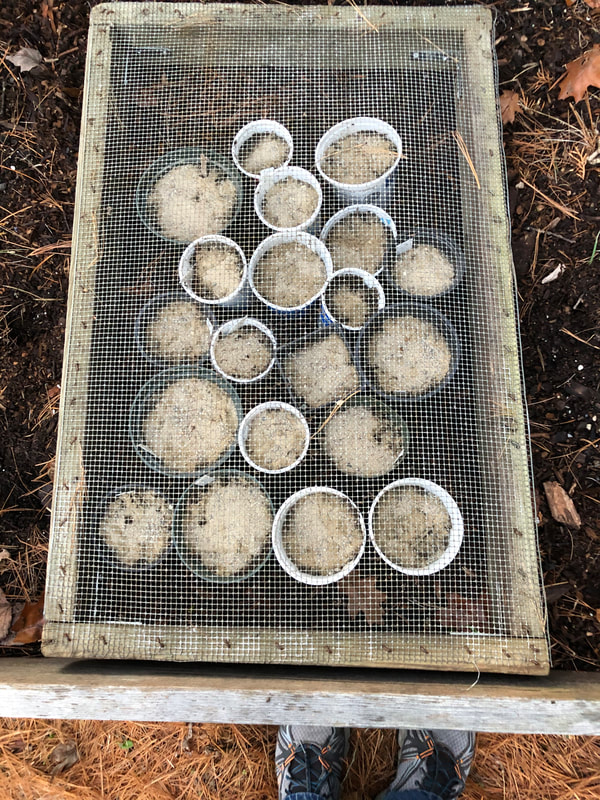
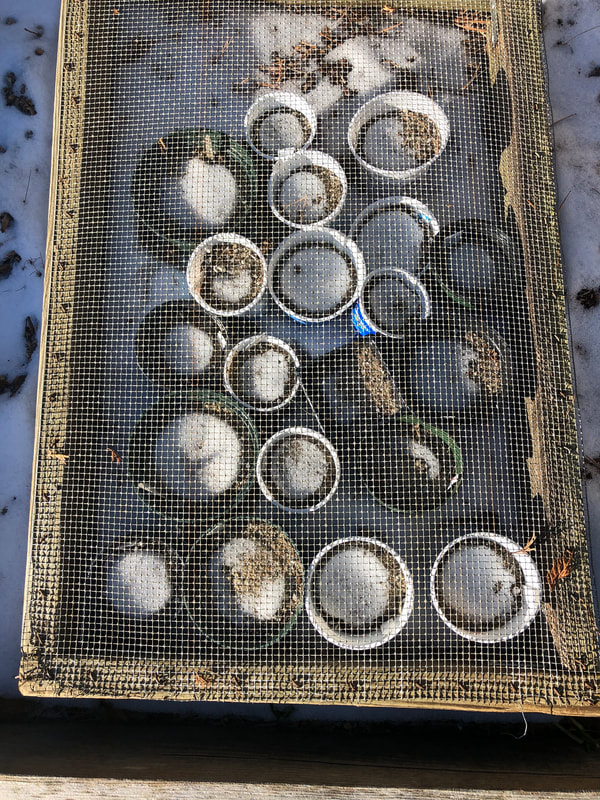
I organized these for the seeds and inserted labels with the name and sowing date pressing the label down below the soil surface along the edge of the pot. I sowed the seeds on top of the soil. I learned that you can sow the seeds closely (much closer than you would in a garden) and covered the seed with builder's sand by sprinkling it on top of the seeds so that each seed is covered to a depth of the size of the seed (a very thin layer for columbine and a thicker layer for the peony seed and plum pits).

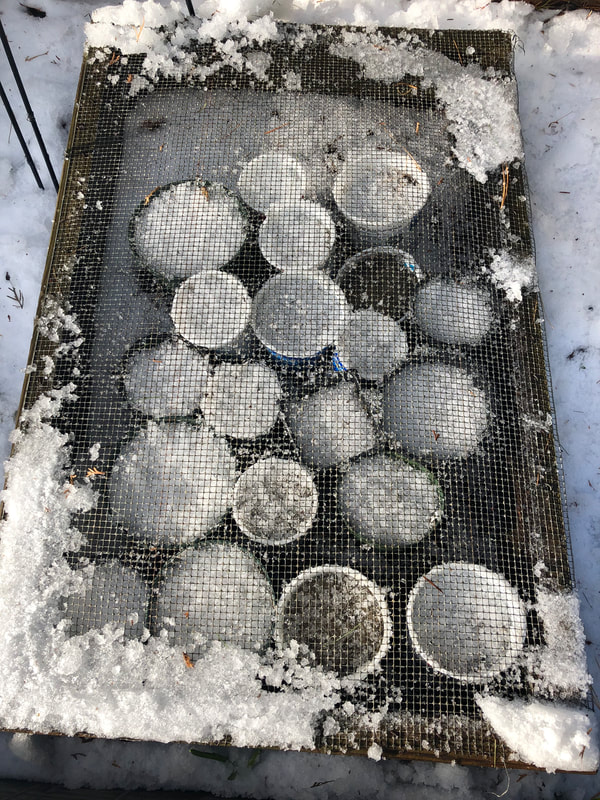
With that finished, I put all of the pots in my raised bed garden and placed my soil sieve on top to keep any animals from digging in the pots to eat the seed or plant acorns (I see you chipmunks and squirrels!). My raised bed garden that gets part sun in the summer and is almost completely shaded in winter (because the house blocks the lower sun) was the perfect location. The instructions call for keeping the soil moist by watering gently weekly (I watered twice until we had sufficient snow and cold for the pots to freeze).
​

Now we wait while nature takes over to rain, snow, sleet, thaw, refreeze, and etc. Native seeds require a cold period to break dormancy and germinate. In March, I will monitor the pots for germination and move them from the raised bed in late April to a partly sunny location when I move my annual garden plants out to the raised bed.

One important note from the class was that germination may take a long time. Patience is required-- each native seed has its own timetable for germination. Some will begin germinating after the cool of spring and others will delay until the heat of summer.

I will post updates on how my seeds and plants are doing throughout the year.

Cheers,
Mark
0 Comments

Large Scale Vermiculture at the Maine State Prison

2/20/2019

0 Comments

 
I was invited to visit the Maine State Prison to see their large scale vermiculture project. The inmates, with the help of VTI Mendes and the support of the warden and Captain Fries, have established a vermicompsting system. They purchased a large (I'd estimate 6'x8') raised bed system that harvests vermicompost by scraping (cutting) from below. It is housed in a daylight basement in one of the buildings and accepts select food waste from the prison kitchen. Everyone involved should be commended for their work (the worms were reproducing without any smell or fruit flies). The project is being carefully monitored and maintained and the dozen or so inmates I met have a very good understanding of vermiculture (they had obviously done some reading!) and asked great questions. They have been working on the system for a little over a year and it is ready to harvest vermicompost. They plan to use some of their vermicompost in their own greenhouse and gardens, but hope to also sell some at the Maine State Prison store. After seeing their work, I suspect they will have an excellent product.

Cheers,
Mark
0 Comments

Barter is Better

9/4/2018

0 Comments

 
From the blog archive; originally published on February 20, 2010

For the past few years I have had a barter offer on my web site. I've had some great barters that I'd like to share. I have bartered worms for:

Honey
Eggs
Knit yard socks
Fresh vegetables
Herbal tea
Soap
Candles
Hand cream
Pies
Bay rum aftershave

These have been wonderful barters, and I am grateful to receive these items in exchange.

The list is not intended to state everything I will barter for. In fact , I am surprised now how many things are on it! If you want worms and have something to barter, let me know.

Cheers,
Mark

Postscript:  In the past eight years the list has grown to include edibles, a truckload of manure, a signed book, and more. Please note that not all offers are accepted, but many are.

0 Comments

Fungus Gnats

8/7/2018

0 Comments

 
From the blog archive; originally published on February 20, 2010

I get questions like this occasionally:

"When I took the lid off the bin I noticed tiny little black flies flying out... I don't think they are fruit flies because I put out a dish with mixture of cider vinegar, water and a little mild dish soap which always takes care of fruit flies but these guys could care less about it! Please help."

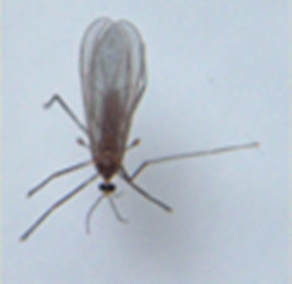
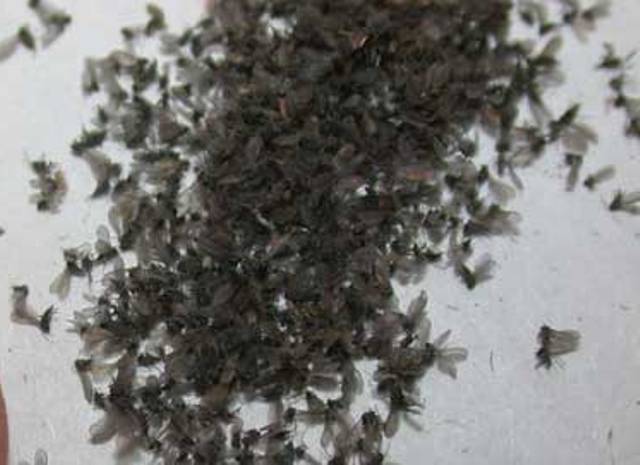
Most commonly these are be fungus gnats (see image). Fungus Gnats are very small 1/32 to 7/16 inch long, long legged and mosquito-like and are usually black, gray, or brown. The larvae feed on moist decaying organic matter and fungi growing in the soil.

I have found the best treatment of fungus gnats to be BTi (Bacillus thuringiensis israelenis) mosquito rings/dunks. To treat an infestation, make a solution of 2 cups of water for about 1/4 of the dunk. Remove the newspaper layer and spray about 1/2 of this solution on the soil daily for 10 days (make fresh solution every 2 days-- one piece of ring lasts 2 or 3 times). Vacuum any adults your can when you open
the lid (dust buster or shop vac work well). Keep the newspaper layer off your bin during the treatment period and do not add food. That should take care of them.

To prevent fungus gnats, be sure to bury any food scraps. If you see mold starting to grow in your bin, replace the newspaper layer and and hold food back until the worms catch up.

Cheers,
Mark
Picture
Picture
0 Comments

Interesting Vermibusiness Model

7/10/2018

0 Comments

 
From the blog archive; originally published on January 23, 2010

A grower in Taiwan contacted me to share a business model he uses. It was interesting, so I am sharing it.

Coordinate with local companies who have compostable trash, develop a group of friends to make vermicompost from the trash, sell vermicompost at the Farmer's Market.

Because businesses pay a lot in trash removal, this can be reduced if you find other people to take their trash and make worm compost to sell. You get the business to pay you to have members of your group members to take away the compostable trash ($1/kg). You sell your worms to your group and coordinate having them pickup the food waste. Then you pay the growers weekly to provide you with a fixed (2-5 kilograms) amount of vermicompost per month ($2/kg) and to pickup the trash (compost food removal at $0.25/kg).

You can sell the vermicompost for about $5/kg at a farmer's market in the city or online. Remember you also make money on the first sale of your worms to your growers and coordinating payment with the businesses.

Your growers will benefit because they only pay an initial start up fee and coordinate picking up food and delivering vermicompost to you. They get a monthly check from you for picking up waste and processing vermicompost.

If you can do this in a city (so you wouldn't spend a lot of money on gas), the whole group could make some decent money. Plus, if you coordinate food waste pickup at restaurants, you'll probably become a friend of the owner (because you save them money) and get some meals for free, too!

It takes some time to set this up, but it works!

Thanks Chen for sharing this. I would add that you could also make vermicompost tea and sell to local landscapers.

Cheers,
Mark
0 Comments

Wood Chips and the Hidden Benefit of Thrift

7/6/2018

0 Comments

 
From the blog archive; originally published on October 7, 2015

I was reading the latest issue of the Maine Organic Farmers and Gardener and enjoyed the article on ramial wood chips. Celine Caron discussed the differences between traditional bagged wood chips used by many people as landscape mulch and ramial wood chips (derived from the branches of deciduous hardwood trees). While ramial wood chips are considered “wood chips”, these might be called “ramial wood prunings”, since they are commonly the byproduct of landscape or forest maintenance.

Celine’s article references her other writings on the benefits of using ramial wood, and briefly mentions their many advantages over traditional wood chips. These benefits include a better C:N ratio, higher nutrient levels, and preferential breakdown by Basidiomycetes. Basidiomycetes support soil organisms that lead to humic and fulvic acids (you need these in your soil fauna for healthy plants).

If you have concerns about these products robbing nitrogen during breakdown from your soil and therefore your plants, you can add nitrogen periodically (some advocate for dilute urine) to balance this or put down a nice thick layer of compost under your wood chips.
The other unmentioned benefit of using ramial wood for you is that this product can be obtained for free. So rather than paying a few hundred dollars (or more if you are buying bagged) for 4 cubic yards of chips, you can get these for free. The only downsides are timing and the potential for invasive or noxious weeds.

I will address weeds first. Like your farmer and compost providers, you should get to know your local arborist. This is more than networking with service providers who are important to your life and lifestyle. Arborists often pay to dump (or pay to haul) waste wood prunings. If they are working in your area they may be happy to give you what they have with a phone call. However, you should speak to the arborist to discuss what you’re doing and why. Part of this conversation should include a discussion that you do not want chips if they are from a yard with invasive species (bittersweet) and noxious weeds (poison ivy). A conversation is all that is needed.

That brings me to the issue of timing. Your arborist may not be in your area when you need or want wood chips. I tell my arborist that I will take whatever he has and set extra wood chips aside in a pile near the compost pile to be used as needed in the future. Also, even if he is in your area, he won’t know until he is onsite whether there are invasive or noxious weeds. For this reason, you may have to wait a few weeks (or months) before chips are available.

I don’t mind waiting a few weeks or months for a great product that is free. In fact, like most good things, I think it is worth the wait.

Cheers,
Mark

Originally published on October 7, 2015
0 Comments

Going Electric

7/4/2018

0 Comments

 
I saw a blog recently that really resonated with me (https://www.treehugger.com/energy-policy/reduce-demand-clean-electricity-electrify-everything.html). In addition to reducing demand, the blog discusses concerns with energy sources, efficiency trends,  and consumer choices.

As a homeowner who strives for efficiency I have been grappling with these issues whenever we face a replacement. I have never been able to frame the issues so succinctly as in that blog.

For example, a few years ago we researched mini-splits to heat our home (our decades old boiler was at the end of its useful life). At that time, the mini split technology was not advanced enough to be a single heat solution in Maine (that has since changed). Because of that limitation, we elected to switch from oil heat to a wood pellet-based boiler. I don't regret that decision, but I would probably reach a different conclusion, were I facing that decision again today.

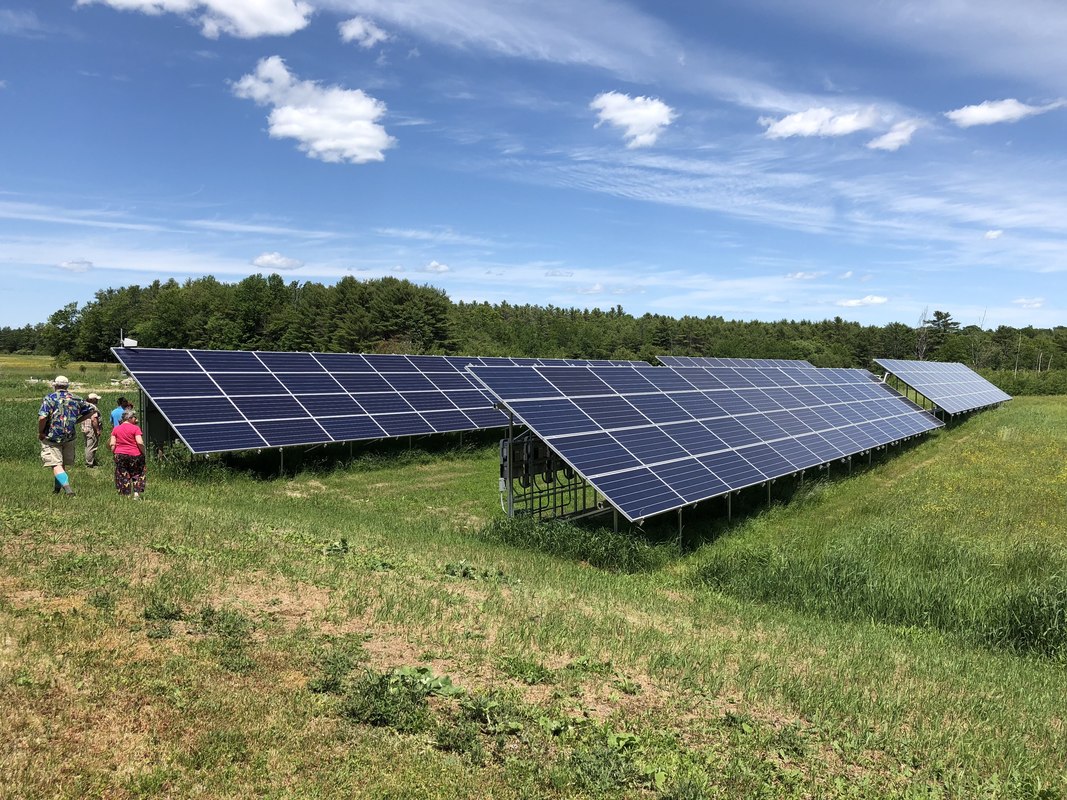
We have gone all in with electricity otherwise-- we are part of a community solar farm (as I mentioned in a previous blog post, our home is oriented badly for rooftop solar). Our stove is induction (which Bert loves) and our water heater is an air-source heat pump. Our cars are still gas (mine is a hybrid), but I expect we will buy electric when they need to be replaced (I don't see the point of getting rid of a paid-for and perfectly useful car just to buy an electric one). 

So we heat with pellets (we use about 2 tons/year on average) and support the Maine forest products industry and generate excess electricity for a few years before we get an electric car. I can accept that. If you are replacing your boiler or building a new home, I would strongly encourage you to consider a mini split. 

Cheers,
Mark
Picture
0 Comments

Help! My worms are crawling out of the bin. What do I do?

3/28/2018

0 Comments

 
It could be a few things:  too warm, too wet, too noisy(vibrations). They could also be hungry, but you’ve done this before so that’s unlikely.

I suggest you verify that the bin is not too warm or wet and is free from vibrations, then leave the lid off and a put bright (at least 100W bulb) light above the bin for a day. That should encourage them back into the vermicompost soil layer.

0 Comments

Biochar as compost deodorizer: vermicomposting experiment report

12/23/2017

0 Comments

 
One of the issues that prevents people from composting (indoors and outdoors) is smelly compost in the collection container in the kitchen. I think this is more likely to be a problem for smaller families (we fill our container too fast for it to get very smelly before we have to empty it!) and probably more likely to be a warm season issue.

If you find this is an issue, I have a solution— biochar. At the Common Ground Fair this year, Todd from Char-Cola (www.char-cola.com) came to my booth to ask whether I had used biochar in my compost collection container. I told him that I had not, he offered me a 1 quart sample to try. I did some reading to ensure that using biochar in my worm bins would harm my worms. Not surprisingly, it doesn’t.

Time for a vermicomposting experiment! A few weeks after the fair, I tried about a quarter cup of biochar on top of our compost collection container and then let it sit covered in the basement to get ripe and simulate what some families might experience. I was surprised that it didn’t smell too bad (rotting potato peels and onion pieces can smell pretty bad). I added the food waste with the biochar to a corner of my bin and marked the corner. Whenever adding something new to your worm bin always add in the corners. Over the next month, I observed that bin as I added food waste to that bin with biochar. During a vermicomposting experiment, I monitor that bin and check the corners. If the worms don’t like what was added they will move away. Adding the biochar to the food didn’t cause the worms to move away and when I peeked in that corner the smell was not too bad. I then monitored that bin for 2 months and everything is fine. I have not tried biochar in my outdoor composting bin, but I cannot imagine that there would be any problems.

I would recommend biochar for those families who have concerns about keeping a compost collection container in their kitchen.

​Cheers!
0 Comments

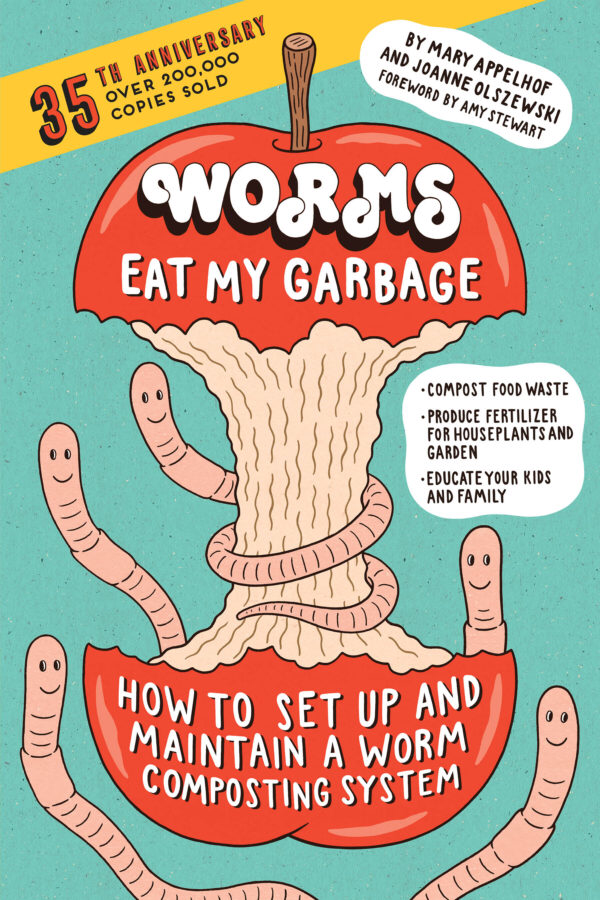
35th Anniversary Edition of Worms Eat My Garbage

12/16/2017

0 Comments

 
The new 35th anniversary edition of Mary Appelhof’s book Worms Eat My Garbage is now available from Storey publishing.

The original version was an excellent resource, but it was difficult to find and some updates were needed.

I was delighted to be asked to serve as an invited reviewer. The new edition honors Mary’s objective of making vermicomposting easy and understandable for beginners.

You can buy a copy (just in time for Christmas!) here (
http://www.storey.com/books/worms-eat-garbage-35th-anniversary-edition/).
Picture
0 Comments

Making a Soil Sieve to Screen Compost

5/27/2017

0 Comments

 
Picture
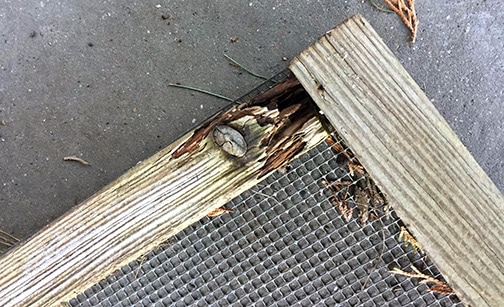
After many years of hard use, I needed to make a new soil sieve. My old one (shown above) was badly rotted at the corners. Even pressure treated lumber doesn't last forever. Note that the galvanized hardware cloth lasted longer than the lumber. Always clean your sieve after using it.

Picture
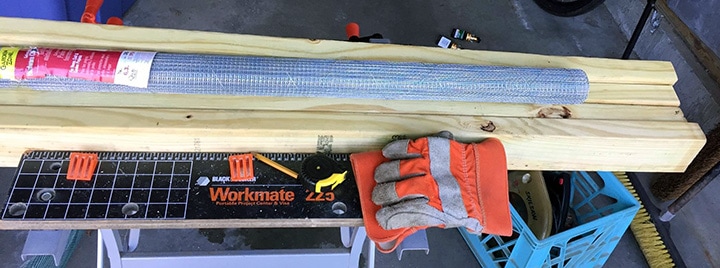
Supplies and resources needed to make a new soil sieve:
  1. PT lumber (2"x4"). Lumber from recycled plastic would have been better, but I could not find it in 2"x4"
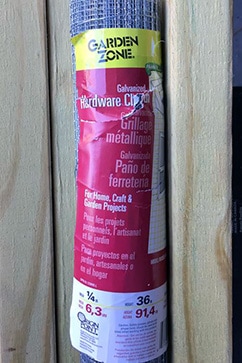
  2. Hardware cloth (1/4"). Other sizes would work, too. I like 1/4".
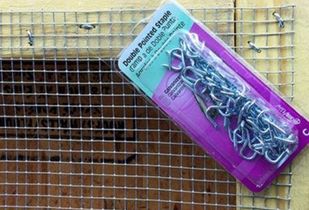
  3. Framing corners and staples (shown later). I used galvanized everything to prevent corrosion from using dissimilar metals.
  4. Total cost is ~$25
  5. Time to complete ~60 minutes
Picture

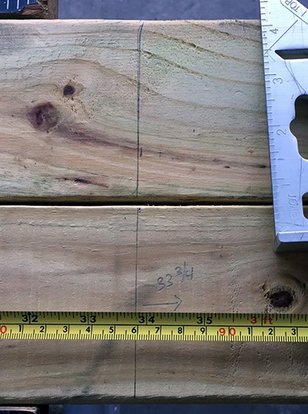
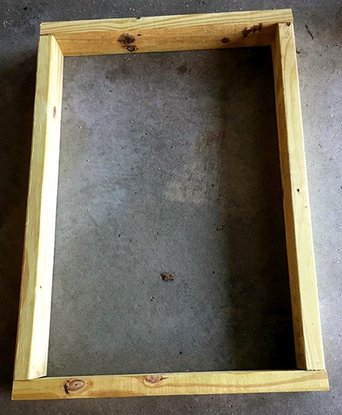
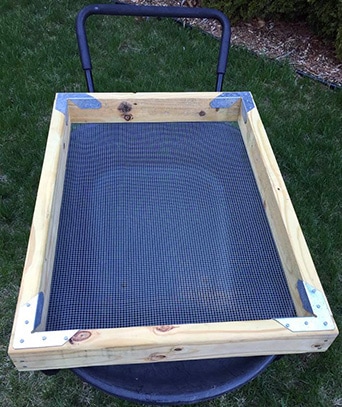
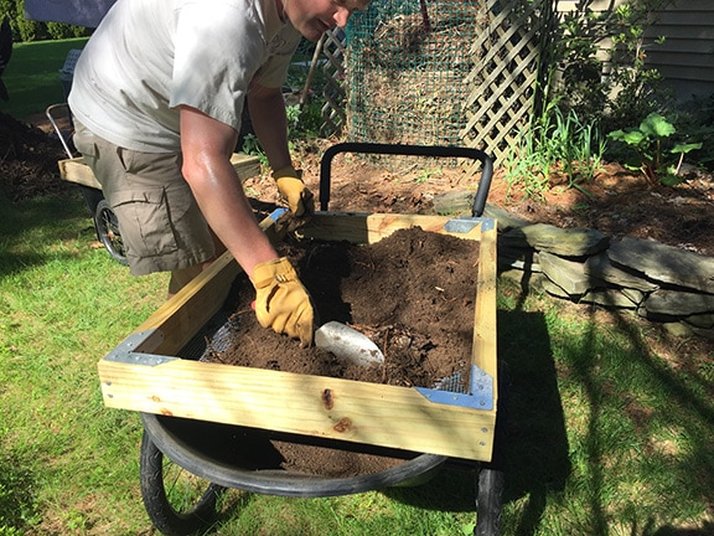
First step is to measure my old one and cut the lumber. I then laid out the cut pieces to make sure they fit together and are square. You want to size it so that it fits over your wheelbarrow to make sieving an easy chore.
Picture
Picture

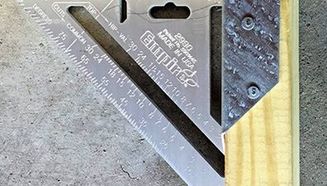
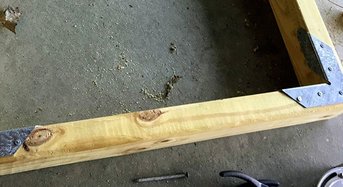
Then square up the corners (using a framing square) and attach using framing corner to hold shape securely. I used galvanized nails with these galvanized corners.
Picture
Picture

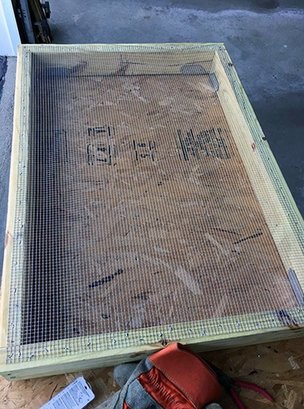
Now comes the tricky part-- attaching the hardware cloth. Flip the frame over so you have only wood (no framing corners) and attach the cut-to-fit hardware cloth to the frame using galvanized double pointed staples.

Two tips: 1) cut hardware cloth as close to inside as possible and mount so it doesn't come outside the wood-- this prevents snagging it on your clothes when carrying. 2) Hold staples with needle-nose pliers when nailing to save your fingers.
Picture

Picture
Picture
You did it! Your finished soil sieve should look like this (bottom is shown on left and top on right). Notice that it fits my wheelbarrow nicely.

This one is build better than my old one. I'm thinking it will last for more than 30 years. That means I'll get to pass it to the next generation.

Cheers!
Mark
Picture
0 Comments

Hype about worms destroying old-growth forests and reality about red wigglers

11/7/2016

0 Comments

 
From the blog archive; originally published on December 24, 2009

I receive many questions about compost worms escaping from the worm bin to destroy forests. If you read the story, it relates to worms introduced by fishermen dumping their bait in the forested areas around lakes.

The fact is: earthworms can harm some environments. In nature nothing is as simple as all good or all bad. The earthworm's ability to tunnel through the soil and make passageways for air and water, to decompose organic material and release its nutrients, and essentially "till" the soil is good news for farmers and gardeners. They are actively growing crops that are continually replanted, and where the soil is continually amended with other nutrients (compost or mulch). Earthworms essentially prepare the soil for us. Here the presence of a lot of worms is good.

On the other hand, in forest ecosystems an overabundance of earthworms rapidly decompose the spongy layer of leaves and plant matter that makes up the forest floor and it is consumed faster than it is replaced by falling leaves and other decay. This 'duff' layer is essential to understory development (tree seedlings, wildflowers, ferns, etc.). Without the duff layer, invasive plants have an opportunity to gain a foothold. Here an overabundance of worms can result in harm.

The underlying (no pun intended) problem is that earthworms are not native to most northern parts of the country, including New England. Earthworms in this area were killed during the ice age. The earthworms in your garden are species from Europe that may have arrived with the Colonists (in soil used as ship ballast or with plants) or gardeners spreading compost or mulch from away.

I am not concerned about my red wigglers. Although I recognize they are non-native, they are not hardy in northern climes and probably won't survive our long Maine winter without a source of heat (hot compost pile). Here in Scarborough, my worms would have to cross Route 1 and the Maine Turnpike to reach an old growth forest (http://www.primalnature.org/ogeast/me.pdf).

Nevertheless, we should use good worm management to limit the potential for a problem. If you live in an area that abuts old growth forest, you should locate your outdoor compost pile and garden away from the woods. The University of Minnesota, which has been a leader in researching and spreading awareness of the problem, has some recommendations (and lots of helpful info) in their Great Lakes Worm Watch.

Merry Christmas!

Mark

Originally published on December 24, 2009
0 Comments

What's in your worm bin?

11/7/2016

0 Comments

 
From the blog archive; originally published on November 9, 2009
You may think you have mostly worms in your bin, but you’d be wrong. In fact, your bin is a very complex and diverse ecosystem. You have hundreds of species of organisms working in harmony to turn your food waste into beautiful compost. Your red worms are only a very small population of the other micro- and macro- organisms that inhabit your bin.

Sometimes new users write me with concerns when they notice some populations that bloom in number. Often they fear these organisms will flee the bin and harm houseplants or become a pest in their home. No need to worry. These organisms are happy in your bin where they have food and darkness. They are decomposers, so they do not harm houseplants.

What is really interesting is that these species have slightly different environmental preferences and food requirements. This means that depending on the conditions in your bin and what you are feeding, you may have some population blooms of these other species. For example, if you place a lot of sugary fruit in your bin, you will see mites bloom followed by an increase in the number of springtails. When their food supply weans they will die off.

Bacteria
Bacteria are by far the most numerous organisms in the vermicompost system. They break down organic matter to make it available to earthworms and other organisms in the bin. Remember, your worms don’t eat the food you put in, but the rot that is on the food. Bacteria are essential to your worm bin, just as they are in outdoor soil.

Mold & Fungi
In addition to the bacteria, mold and fungi are busy decomposing the organic matter in your worm bin. They are also an additional food source to other organisms in the system, including earthworms. Because they can grow big enough to be seen, these can be a sign that you have more food than the system can quickly manage and the feeding rate should be decreased. Mold and fungi pose no threat to the garden or the animals living in the worm bin, but overgrowth of these can cause irritation to humans with mold allergies. To keep them under control, feed in small amounts and when you see an overgrowth of these hold back on feeding.

Mites
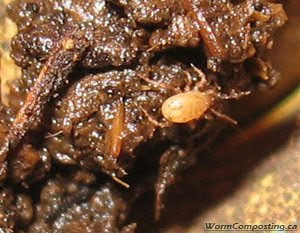
Mites (reddish brown specks about as large as a typed period) are commonly found on the surface of the bin (if your bin is light colored, you can often see them on the sides near the soil). Mite populations will bloom when you have wet, sugary foods (fruit) in your bin.

Springtails
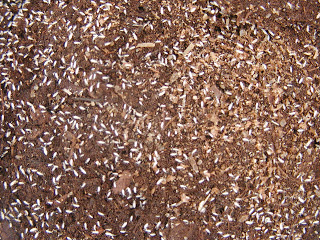
Springtail are an insect (white or tan) that can be seen fairly easily on the surface of the soil. They are beneficial in the system and have no interest in living plant tissue. Some texts claim that more than 80% of the organic matter on earth passes through the gut of a springtail or sow bug on its journey to becoming topsoil. They are most noticeable after a bloom in the mite population or in nearly finished compost.

Potworms
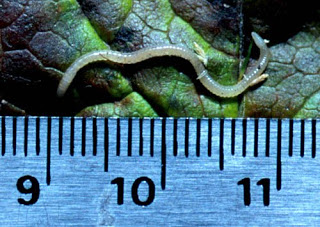
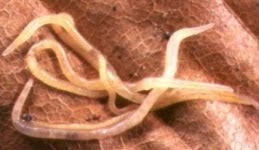
Sometimes mistaken for young red worms, these are very small white worms. They too are beneficial organisms that feed on decaying organic matter. Potworms are more common when your worm bin is on the acidic side, but they do not necessarily mean that you have a problem. You will see them after adding a lot of citrus.

Tips for keeping your bin running smoothly
Remember: the food waste you add to you worm bin today isn’t eaten by the worms until the other actors in your bin have done their job. Bury your food (adding the amount appropriate to the number of worms in your bin) to bring these organisms in contact with your food to get the process started and next time you have a moment, take a close look at your ecosystem. You may be surprised at the complexity of the system you are maintaining.

As always, your senses should be your guide to vermicomposting. What do you see, smell and feel in your bin?

Cheers,
Mark

Originally published on November 9, 2009
0 Comments

Are you wondering what to buy for Christmas?

11/7/2016

0 Comments

 
From the blog archive; originally published on November 25, 2009
A worm bin and pound of worms make a great Christmas gift.

I am not alone in this idea। I had someone come by my booth at Common Ground who told me that a worm bin and pound of worms the hot item at Yankee swap. Also, several people purchased worms and a bin from me this year as gifts for mom.

Worm bins need not be expensive or complicated. I think a simple bin is really a lot easier to use (and certainly easier to build!).

In my mind, the perfect gift would be a book on vermicomposting (like Mary Appelhof's book, Worms Eat My Garbage: How to Set Up and Maintain a Worm Composting System), a pound of worms and a new bin.

If you are already vermicomposting, you can provide the worms and make the bin. If you're an experienced vermicomposter, you can provide a vermi-consultation and skip the book. The more people we have vermicomposting the better.

If you are looking for other gift ideas, I recently created Amazon lists of my recommended vermicomposting supplies, as well as favorite garden tools and books.

You can view at:
  • WormMainea vermicomposting tools and supplies
  • WormMainea gardening tools and book recommendations

Happy Holidays!
Mark

Originally published on November 25, 2009
0 Comments

What is the best size for my worm bin?

10/11/2016

0 Comments

 
From the blog archive; originally published on October 6, 2009
Really that is determined by what works for you in the space you have.

You can buy manufactured bins online or in progressive stores, but I suggest you save your money and make one yourself!

When I respond to this question, I offer the following suggestions and considerations:

Red wigglers don’t typically dig more than 8” deep into a worm bin, so a really deep bin does not work as well as a shallower bin. You want to have the worms all the way at the bottom of the bin to keep conditions aerobic.

Really large bins (30 or 50 gallon size) can be used for worm bins, but they are VERY heavy when full of worms and vermicompost. If you’re planning to move your bin (e.g., take it outside to harvest using the sun), consider a series of smaller bins. If you're not going to move it, these large bins can certainly work.

Small bins can also work. Some people have shoebox size bins they keep under the kitchen sink. This can work, however, you must closely monitor conditions in your bin and be careful what you feed them. In a small bin the worms have nowhere to escape if the conditions become unhealthy. A friend had a wonderful bin until a bunch of limes were added in a layer to the bin after a Cinco de Mayo party. Soil pH dropped and all the worms died. This is also why I recommend you feed in the corners when you are starting.

I find the standard 18-gallon plastic storage totes work well for me. They are reasonably sized to allow the worms to flee from any bad things you may add, they are not too when full, they don’t take up too much space in the room, and they can be stacked. Click here for instructions to build your own bin.

The size and style of your worm bin is not important. If it works for you then it is best. The most important thing is that you get started with a worm bin.

Cheers,
Mark

Originally published on October 6, 2009
0 Comments

Overwintering Red Wigglers Outside (?)

9/9/2016

0 Comments

 
Picture
Without fail I get questions this time of year about keeping worms outside: Can I (How can I) keep my worm bin outside over winter? What about the garage/shed? etc.

I do not take my worm bins outside except to harvest, but here are some tips and tricks reported by others and my own observations about keeping red wigglers outside in cold weather.

First, the facts. You cannot vermicompost in freezing conditions. Red wigglers will die if the soil they are in freezes. I know they can become dormant and cocoons can survive, but in general most will die and your vermicomposting will cease when the pile freezes. In reality, when your soil temp drops down to 40F and below, your composting is so slow as to be stopped. Just like your fridge, things below 40F decompose very slowly.

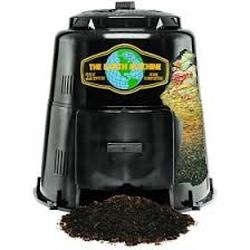
In my 10 years of vermicomposting I have had worms survive outdoors only one year. It was in my outdoor composter (Earth Machine; see image below). It was 3-4 years ago. We had a relatively warm winter with no long cold spells and little snow cover. I went outside in early March and I took the lid off and discovered 3 red wigglers hanging out in the warm condensation on the lid. First and last time ever. I can only guess they were dormant and found a spot they could survive (not a deep freeze year and sun warmed the container just enough?). Typically, the Earth Machine is a compost popsicle. I wait until early April for the soil temp in the outdoor composters hit 50F, then I bring a bunch of red wigglers out to get them going. I am really bad about mixing the outdoor compost piles, so I sacrifice some red wigglers to do the work for me.

So if your bins are outside, you have 3 options: 1) bring your bin indoors, 2) start over with new worms in an indoor bin, 3) insulate and heat your bin to keep it from freezing.

I cannot use option 1 because of Bert's rules ("No bad smells and not bugs in the house"). Outdoor bins typically have insects, so that rules that out for me. If you (and your family) are OK with that possibility, then option 1 may be for you. These two options are pretty simple.

The more difficult proposition is option 3: keeping the bin outdoors and keeping it from freezing (and ideally between 60-70F).

You could with a big enough pile continue to add a hot manure to keep the soil warm enough. The key would be hot but not too hot (a pile rather than an impermeable enclosure like a bin or tub). I know my brother's horse manure windrow in Northeast PA works year round. They add to it frequently and it can be found steaming with active red wigglers year round. Reportedly, chicken or pig manure will also work.

Others have reported heating/seed starting mats under plastic wading pools in the shed with a styrofoam cover work. This would keep the soil temp relatively constant.

Another person proposed digging a pit below the frost line and insulating the sides and top with closed cell foam insulation and a trap door lid. Then piling hay bales over the door. I don’t know whether this was successful, but my frost line here is fairly deep and it wouldn’t be practical. Also, this would not make sense to me because one of the reasons I started vermicomposting was to NOT go outside to compost in the cold weather. 

If you have experience with any of these, please leave a comment.

As for me, I will continue to compost indoors in my basement.

Cheers,
Mark

Originally published on October 30, 2009

0 Comments

Leaf Blowers are Evil!

9/9/2016

2 Comments

 
There are few things I hate more than a leaf blower. They are loud, smelly, and potentially dangerous to your health.

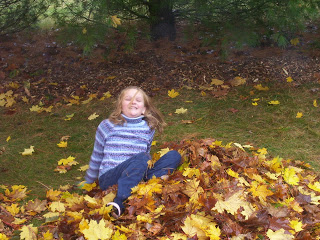
In my mind, raking leaves in the fall is an enjoyable, peaceful event that marks the end of summer. The sound of the leaves and the rake moving over the ground, the crunch of the leaves when a child jumps into the pile, the smell of crispy fall air.

Using a leaf blower may be faster, but is it worth it?

All these are lost when you are holding a leaf blower. The electric ones pollute far less than the gasoline powered models (which can be 80 times more polluting than an automobile! See: http://www.epa.gov/ttn/chief/conference/ei15/session5/fitz.pdf).


Leaf blowers stir up settled dust, mold, and allergens settled on the soil, making these airborne can cause problems for people with asthma and allergies.

Also, leaf raking is great exercise for you.

Cheers,
Mark

Originally published on October 23, 2009
Picture
Picture
Picture
2 Comments

Worm compost tea vs. worm bin drainage

9/9/2016

0 Comments

 
If you're reading my blog, then you probably know that worm compost tea is great for your plants. I want to make a distinction though: worm compost tea vs. worm bin drainage.

In my mind, worm compost tea is distinctly different from the liquid that drains from some bin designs (what I call worm bin drainage).

Worm compost tea is made by separating the vermicompost from the worms and steeping the worm compost in water to make a tea. My website has complete instructions for brewing up your own worm tea: 1# of vermicompost in a 5 gallon bucket of water.

I don't mean to say that the drainage from a worm bin would be bad for plants. From what I have read it is great fertilizer; however, I'd be concerned about putting it on edible veggies because you do not know what is in it. I have also found a variety of different reports on how to use it ranging from straight (undiluted) to diluted to the color of straw. If I were to use this on salad and other greens I probably diluting it to straw color and bubbling air through it for 12-24 hours using an aquarium bubbler.

If anyone has experience using worm bin drainage, I'd love to hear how you prepare it for use.

Cheers,
Mark

Originally published on October 8, 2009
0 Comments

Meeting fellow vermicomposters-- Anyone can vermicompost

9/9/2016

0 Comments

 
I thoroughly enjoy meeting other vermicomposters (new and old). While I do mail worms, I prefer to meet people who are buying from me. This saves them money and allows me to spend a few minutes educating so they get off to a good start.

When I started WormMainea, I assumed those who visiting my site and contacting me would be a narrow portion of the population, Essentially, people a lot like me: frugal, eco-minded people looking to experiment with a different way of composting that allows you to compost inside in the winter. 

Well I got it completely wrong! I meet all sorts of interesting people ranging from back-to-earth retiring hippies who want to vermicompost again to apartment-dwelling professionals who want to reduce their waste, from former Everest climbers to college students, from monks to manufacturers of skate-chic clothes, and everything in between, including some frugal, eco-minded composters like me.

I am continually amazed by how many people are interested in vermicomposting and the cross section of the population that contacts me. I enjoy talking with them about how they found me and how they became interested in vermicomposting.

Cheers,
Mark

Originally published on October 3, 2009
0 Comments

The joys of teaching vermicomposting

9/9/2016

0 Comments

 
I really enjoy teaching vermicomposting to school children. Their excitement is wonderful, and some of the questions catch me by surprise. 

Another observation by teachers has also caught me by surprise: several teachers, especially younger grades, have reported back that after my vermicomposting demonstration and the arrival of the worm bin there has been a change in the snack diet of the classroom . 

Children want to participate in feeding the worms. However, only some food can be placed in the worm bin (e.g., remnants of fruits and vegetables and NOT processed sugary or salty foods), so children who want to feed the worms must bring in fruits and veggies.

Who would have thought vermicomposting would make children eat better?!

Cheers,
Mark
Originally published on September 28, 2009
0 Comments

Why do you need a garbage disposal?

9/9/2016

0 Comments

 
The answer is: you don't!

Aside from the gut wrenching fear of recovering an item that has fallen in there with your hand, garbage disposals are very wasteful.

A worm bin and outdoor compost pile make this common household appliance unnecessary. Everything that goes in the disposal can go in your worm bin or your outdoor compost pile.

Some people call their disposal the "pig". Likely, because the disposal takes the place of the family pet pig that would eat the food waste. Vermicomposting is much slower than feeding a pig, but worms are far more manageable for keeping indoors.

Did you know: disposals use about 500,000 gallons of water per day in the United States (both in your sink and during sewage treatment).

Food in the garbage disposal goes to water treatment facilities, and from there into the environment where it's at least three times more likely to disrupt ecosystems (via algal blooms) than it would if it went to a landfill. (Not that it's so great there either...)

Food scraps make up at least 10% of space in our landfills and off-gas methane, a greenhouse gas.

Through composting a typical household can keep 500 lb of biodegradable kitchen and garden waste out of landfills every year! That is per home!!

Do you feel empowered? I do. Feed your soil, not the sewer or landfill. 

Cheers,
Mark
Originally published on May 3, 2009
0 Comments

The effect of worm compost tea on Amaryllis

9/9/2016

0 Comments

 
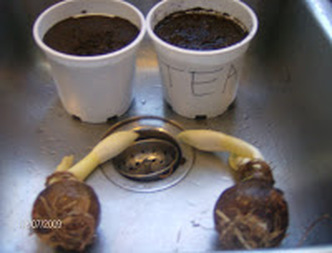
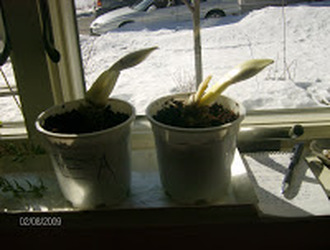
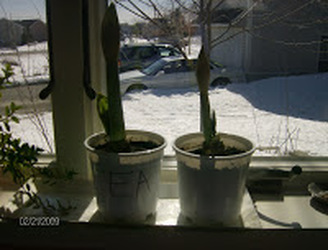
Hypothesis: The Amaryllis that receives worm tea weekly will do better than the one receiving just water.

Methods: We started with 2 identical Amaryllis hippeastrum bulbs. One was watered with worm tea, the other was watered with tap water. Both were planted according to package instructions and were placed on a south-facing window side-by-side. We documented growth for 1.5 months. Start 2/14/09

Results: The Amaryllis receiving worm tea grew faster, bloomed faster and the bloom lasted longer than the one receiving just tap water. Yes, our plant with the worm tea had 2 blooms, but I think that was just chance.

The photos tell it all. Try making some worm tea for your indoor plants.

Cheers,
Mark
Originally published on April 9, 2009

Picture
Picture
Picture
Picture
0 Comments

Retreating snow uncovers presents from neighborhood dogs

9/9/2016

0 Comments

 
Picture
It never fails. With the retreating snow, frozen dog poo is revealed in my yard near the sidewalk. You'll find this also at the beach. I understand this is not always controllable and forgive the owners who forgot to bring a bag. I don't have a dog, but I sympathize with owners who have to clear the yard in the spring. The typical dog produces more than 200 pounds of waste each year, according to the USDA's Natural Resources Conservation Service.

What to do with it?

There is a solution, and I don't mean entombing the poo in a plastic shopping bag. Of course, the solution involves worms!

When it comes time to pick up after your pet, plastic shopping bags are bad options. If you choose plastic, you are wrapping something that degrades quickly in something that takes decades to break down.

Instead, use sturdy paper, or plant-based biodegradable bags. The corn-based BioBags, for example, are certified by the Biodegradable Products Institute to break down in a matter of days (in industrial landfills; probably longer in a home compost pile).

If you chose to compost your pet waste,you should have a separate compost pile for pet waste, and you should not use the resulting soil on anything edible. As always, you want the compost pile to be HOT. The best practice is to ensure optimum temperatures is through layering and turning.

Or you can use worms...
The best solution (in my opinion) is to collect the poo in a bag (paper or biodegradable) or with a shovel and use it to fertilize your lawn (ensuring it is never used for food).

Essentially you are vermicomposting dog poo outside in the ground outside with a fancy cover.

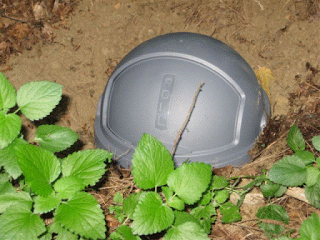
You can make your own a poo-doo vermicomposter to put on your lawn. You dig a hole in your lawn and insert a roll-top garbage can with the bottom cut out. Fill the hole half way with bedrun worms and it is ready to go. Be sure to place it away from low-lying areas of the lawn.

When it is nearly full, dig another hole, remove the garbage can and start again. You can cover the old hole with the sod you dug for the new hole or new grass seed. Like the grass near the septic tank, it will be a lush spot in your lawn.

The response on this has been great from people using it. It makes so much more sense than sending it to the landfill.

If you have worms, you can do this in about an hour with a cash outlay of <$20 to buy a container with a cover (like the Rubbermaid bullet 2 gallon roll top can) that will last for years.

Try this in your yard and let me know how it goes.

Cheers,
Mark
Originally published on April 4, 2009

0 Comments
<<Previous

    Mark Follansbee

    Vermicomposting and beyond! Check out what I've been up to on my blog.
    Please note that I'm migrating my blog from its original site. I'll be reposting previous entries until the move is complete. Click here to visit the full Blog Archive.


    Archives

    September 2021
    January 2021
    February 2019
    September 2018
    August 2018
    July 2018
    March 2018
    December 2017
    May 2017
    November 2016
    October 2016
    September 2016
    August 2016
    July 2016


    Categories

    All
    Bacteria
    Barter
    Bee Boxes
    Bugs
    Composting
    Compost Tea
    Energy
    Frugal
    Garden
    Gifts
    Heating
    Insects
    Large Scale
    Lawn Care
    Manure
    Native Plants
    Pet Waste
    Recycle
    Red Wigglers
    Soil
    Solar
    Vermicomposting
    Windrows
    Worm Bins
    Worm Castings
    Worm Composting


    RSS Feed

    View my profile on LinkedIn
Powered by Create your own unique website with customizable templates.